.jpg?width=1600)
Last month Amazon announced that the AWS Appstream 2.0 service now has Linux compatibility. In this blogpost CloudNation's Joost Wolfsen will be taking a closer look at the Linux compatibility for Appstream 2.0 by setting up an Appstream image with a simple application installed.
This setup was already possible when using a Windows based Appstream image, however using Linux based images has two cost benefits:
- You don’t have to pay for the Microsoft RDS license on a monthly basis. Currently this costs $4.17 a month for each unique user that uses the solution.
- The hourly rate of Linux based streaming instances is slightly lower than the Windows based images. A Linux stream.standard.small image in the EU-West region is $0.016 cheaper per hour than the same instance for Windows. The stream.standard.large instance type the Linux instance is $0.023 cheaper per hour of use.
Setting up the Linux image
In this how-to we will configure Appstream 2.0 to function as a Bastion Host with Putty that can manage our EC2 servers in a private subnet.
1: Navigate to the Appstream 2.0 console in AWS
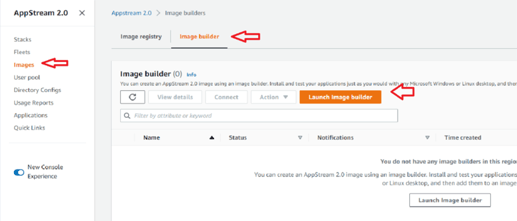
2: Select images in the left hand navigation pane, then select image builder at the top.
3: In the Choose an image selector screen select the Appstream-AmazonLinux2-11-19-2021 type of the instance family “General Purpose”. Other instance types provide more graphics power but since Putty doesn’t need that we will select the cheaper option.
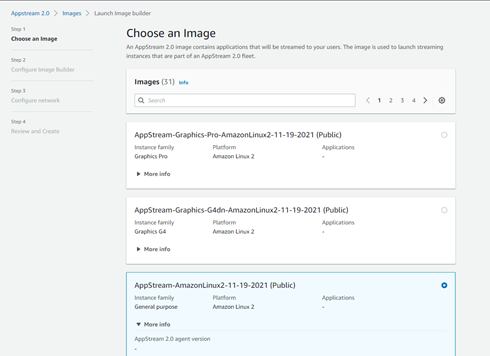
Then click next at the bottom of the page.
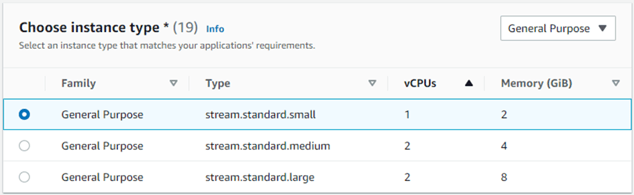
4: In the next step we will give a name, assign an instance type and select from where the Appstream application should be accessible.
We assign a descriptive name.
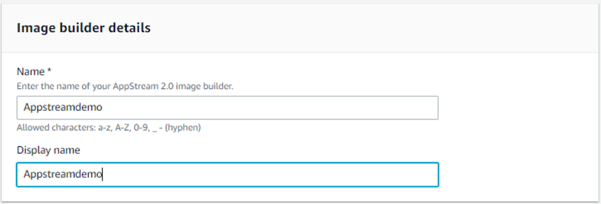
We choose the most simplistic instance type because we won’t need a lot of processing power or memory to install Putty in the image builder.
We will select Internet as the Streaming Endpoint. Then click next at the bottom of the page.
5: Now we will configure the network settings for this group. To allow access to the instances that we want to connect to we assign a security group which allows access to our EC2 instances.

Now press next at the bottom of the page.
6: The next step is connecting to the image builder image which should now have the status of running. We do this by selecting the image and pressing the connect button.

The Image Builder will open as a virtual desktop in your browser.
7: When connected to the image builder we will enable the Epel repository in the terminal and download Putty. We do this with the following commands:
sudo amazon-linux-extras install epel -y
sudo yum-config-manager --enable epel
Yum install putty
Yum install libcanberra-gtk*
8: Now we will create a shell script that is used to create a manifest file for the Appstream Image. In this case we named the script getfiles.sh and it should have the following content:
#!/bin/bash
## usage getfiles.sh $pid
lsof -p $(pstree -p $1 | grep -o '([0-9]\+)' | grep -o '[0-9]\+' | tr '\012' ,)|grep REG | sed -n '1!p' | awk '{print $9}'|awk 'NF'
We will make the file executable with:
chmod +x getfiles.sh9: The next step is to start Putty in the terminal and get the process ID (PID) of Putty in a second terminal:
putty (starts putty in terminal 1)
Ps -ef | grep putty (get the Putty PID in terminal 2)

Please keep the terminal that was used to launch Putty running for now.
10: Next up is creating the manifest file for Putty, in this case Putty had a PID of 3458:
./getfiles.sh 1337 > /tmp/puttymanifest.txt

11: Now we will create the App in the image with the following code:
sudo AppStreamImageAssistant add-application \
 --name="Putty" \
 --absolute-app-path="/usr/bin/putty" \
 --display-name="Putty" \
 --absolute-manifest-path="/tmp/puttymanifest.txt"
12: Which should give this result:

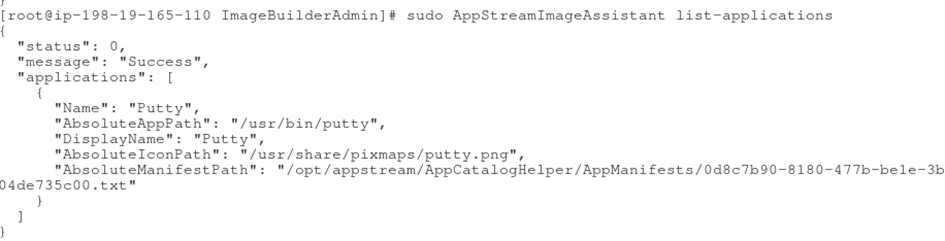
We can verify successfully creating the application with:
sudo AppStreamImageAssistant list-applications
13: Now we will create an image after which the Image builder machine will shut down. We will use this command:
AppStreamImageAssistant create-image --name "Putty" --display-name "Putty"

14: Now that the Image Builder has shut down we will In the Appstream 2.0 console we will now go to images and search for the image named Putty that we’ve just created:
To prevent unnecessary costs we will return to image builder and verify that the image builder that we’ve previously used goes to the status stopped. This happens after it is no longer showing the status “snapshotting”. When the Image builder is stopped we will remove it, because Image builders also incur costs when stopped.
Creating a fleet for the image
Now that we have built an image we have to assign in to an Appstream Fleet which after which we can assign it to a Stack which in turn allows us to give users access to the application.
1: To do this we will go to the fleets tab in the left hand navigation pane and select the orange “Create Fleet” button on the right:
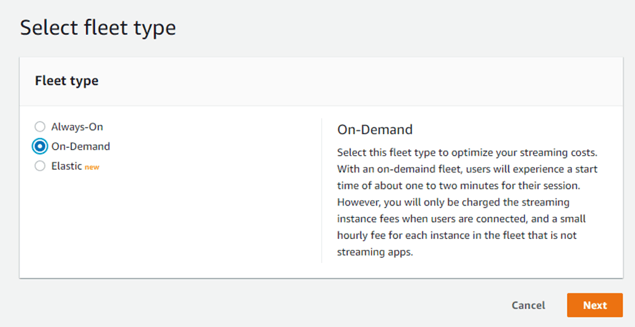
2: In the next step we will have to select the type of fleet. We can pick Always-on, On-demand or Elastic. With the image we just build Elastic Fleets will not work, On-demand is the cheapest of the other two options, so we will pick on-demand and press next.
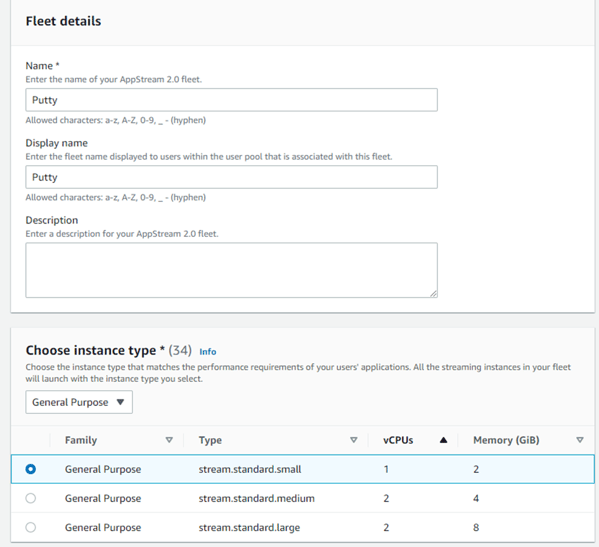
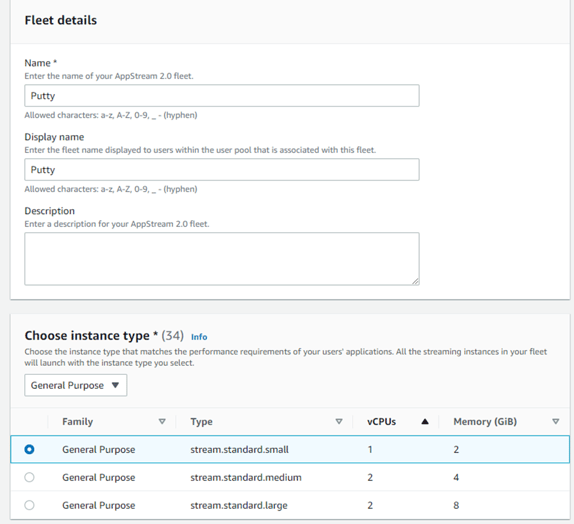
3: Next we will have to supply our fleet with a name, choose an instance type as well as apply settings for scaling policies and IAM roles. In this case we will just give the fleet the name Putty, Select stream.standard.small as the instance type and leave all other settings on default and press next at the bottom of the page.
4: Next we will have to select which image we will use with this fleet. In this case we select the Putty Image that we created previously and press next at the bottom of the page:
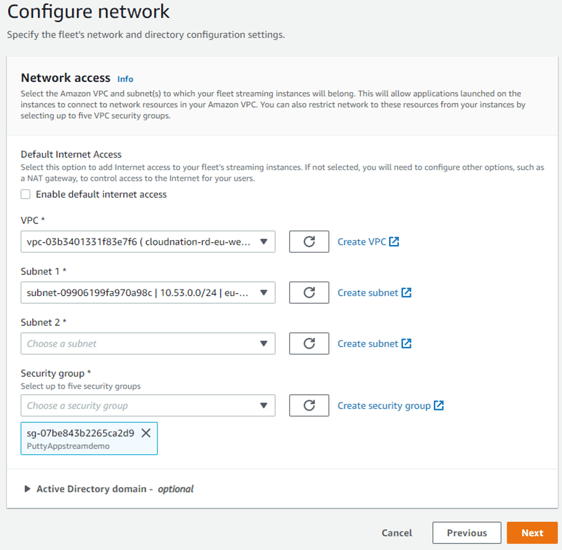
5: Now we have to supply the Fleet with network settings. For this demonstration we will use the same settings as used with the image builder. We will need internet access in our Appstream apps for a later stage, but we will do so via a NAT gateway in the subnet that we are using. We will thus leave “Default internet access” ticket off Then press next at the bottom of the page.
6: At the next page we will review the settings and finalize the creation of our fleet.
Creating a stack
Next up is the creation of a stack.
1: Select stacks in the left hand navigation pane and press the orange “create stack” button on the right.
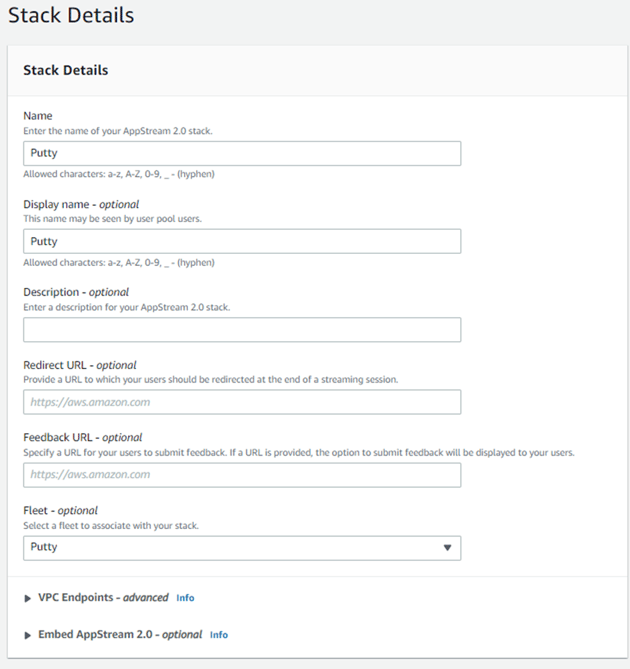
2: Fill in the stack details. We will just assign a name, displayname and the correct fleet to our stack:
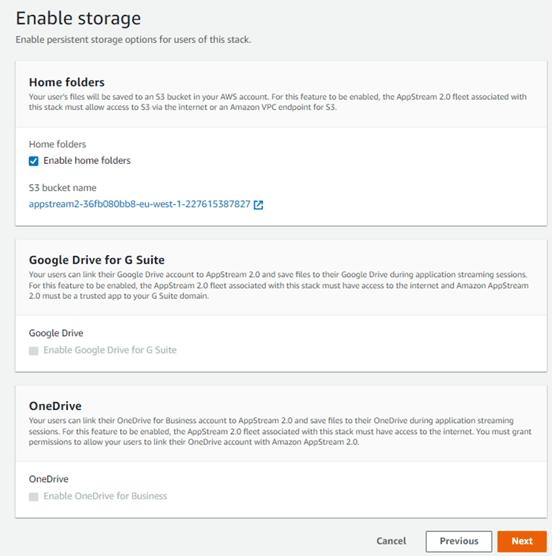
3: In the Enable storage menu we will keep the button for homefolders selected as by default. For homefolders to function we will need internet access in the Appstream image. We achieved this by using a subnet with a NAT gateway.
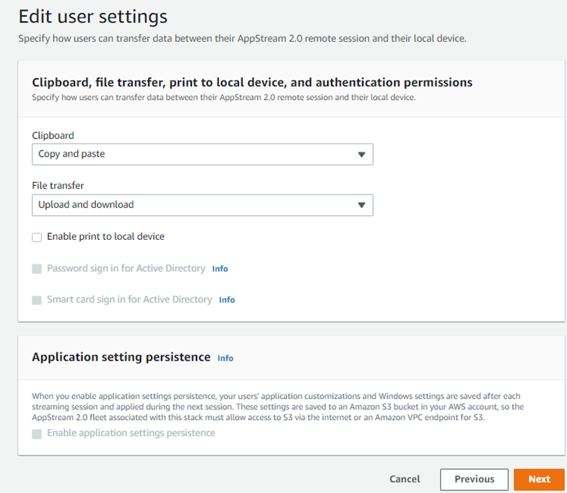
4: We can now edit the user settings. To allow users the up and downloading of certificate files to the application we will allow file transfer as such. Copy and pasting is also allowed because that is also useful with an application such as Putty. Press next at the bottom of the page:
5: Review the settings that we just configured and select create stack at the bottom.
Setting up and allowing user access
The final step in this how-to is settings up a user account and allowing this user access to the application. In this how-to we will use the user pool that Appstream provides, alternatively you could integrate with most identity providers via SAML 2.0. This is out of scope for this how-to.
1: Select user pool in the left hand navigation pane, then press create user on the right
2: Fill in the email address, first and last name of the user you want to create. You will now return to the user pool overview.
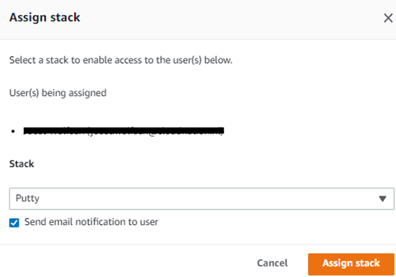
3: Select the user, press the action button, press “Assign stack”

4: Select the stack that we created previously to assign the user to it. Leave the send email option selected as by default.
5: The user that we created will now receive an email with a link at which they can complete their registration.
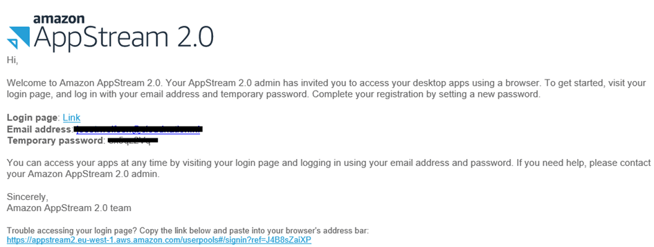
Complete the registration and login.
6: You are now logged in to Appstream and can select the Putty application. Bookmark the login page link for future usage.
7: After selecting the Putty application we will be forwarded to a screen that shows us the progress of launching the app. Because we selected the on-demand instance type this may take some time. If you use the always-on instance type the launching of the application is near instant.
8: And finally we are signed in to our application:
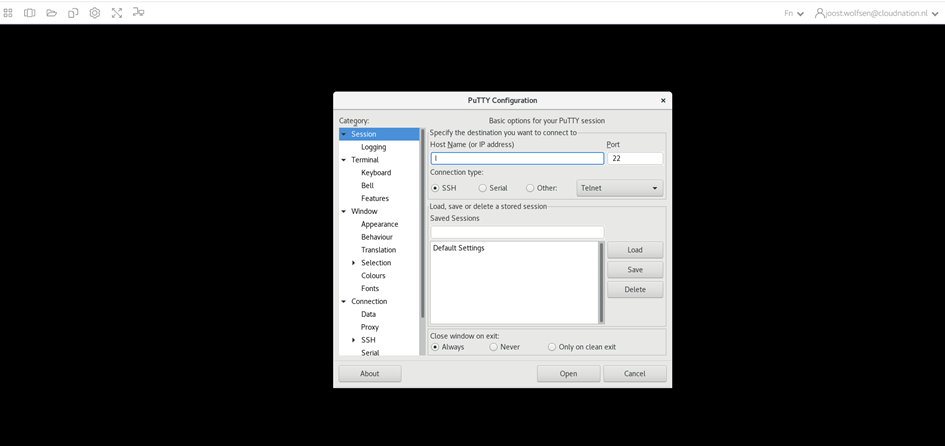
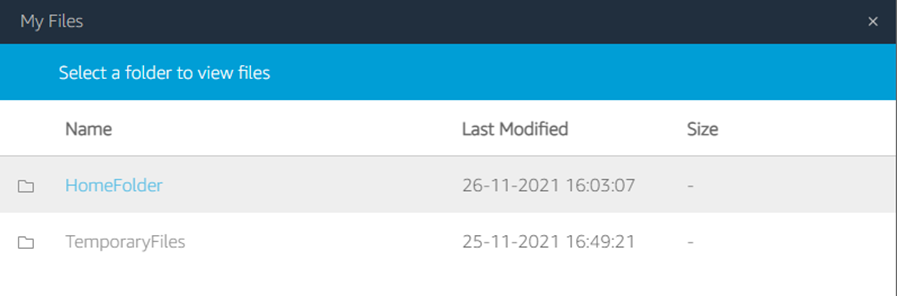
By selecting the My files button on the top left we can open the file system and upload for example certificate files to our Linux instance.

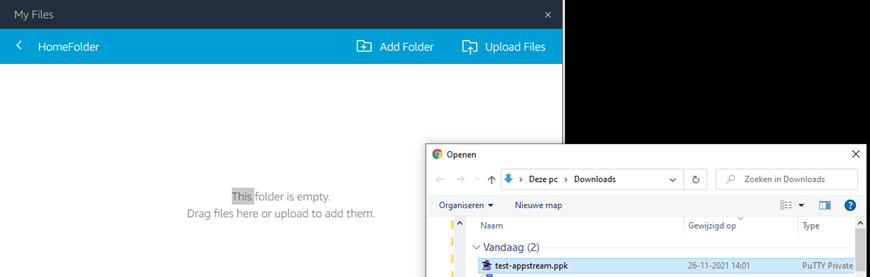
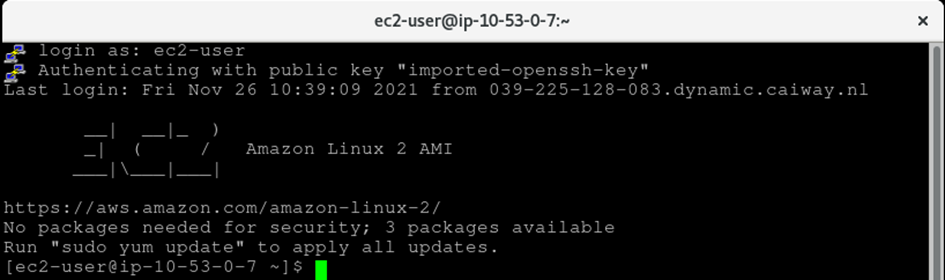
12: And to demonstrate we can now connect with an EC2 instance with our Putty client in Appstream:
Improvement ideas
This was just a demonstration of the use cases for Appstream 2.0 and the Linux support it now offers. In practice this idea could be enhanced further by for example:
-
Deploy the infrastructure using Infrastructure as Code such as CloudFormation, CDK or Terraform
-
Publish your application as a SaaS application: https://aws.amazon.com/appstream2/getting-started/isv-workshops/saas/
-
While there is no official way to automate the ImageBuilder process, a running ImageBuilder can be managed using AWS Systems Manager, so software installation can theoretically be automated.
Do you have any questions about these instructions or would you like to talk cloud with one of our engineers? Get in touch!